


By Kia Lor
How to Round Your Photos in Pixascape
Did you know that rounding the corners of your photos can give them a softer look that's easier on the eyes? In this tutorial, we'll show you how to round your photos in a matter of a few clicks using Pixascape.
Pixascape is a photo editing software that comes with Silver and Gold Plus Memberships. The software is all online so that you can edit your photos on the go from anywhere. You can even use your phone with Pixascape if you want to!! Not a Plus Member yet? Then sign up for a free 30 day Gold Plus Membership trial today!

Pick a great photo like the one we are using in this tutorial of four women celebrating. Then open the photo in Pixascape.
Step 1 - Access the Round Tool
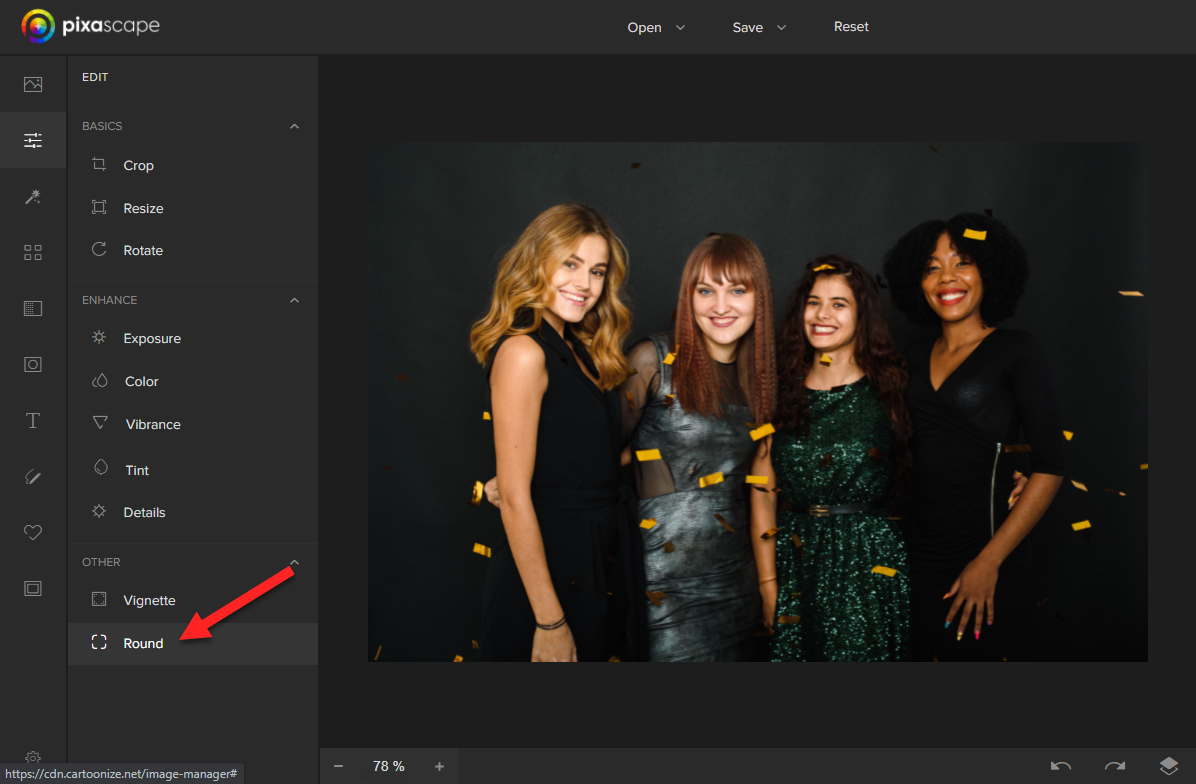
You will be in the Edit panel by default when you open or upload a new photo. In the Edit panel, click on Round at the bottom of the list.
Step 2 - Edit the Corner Radius
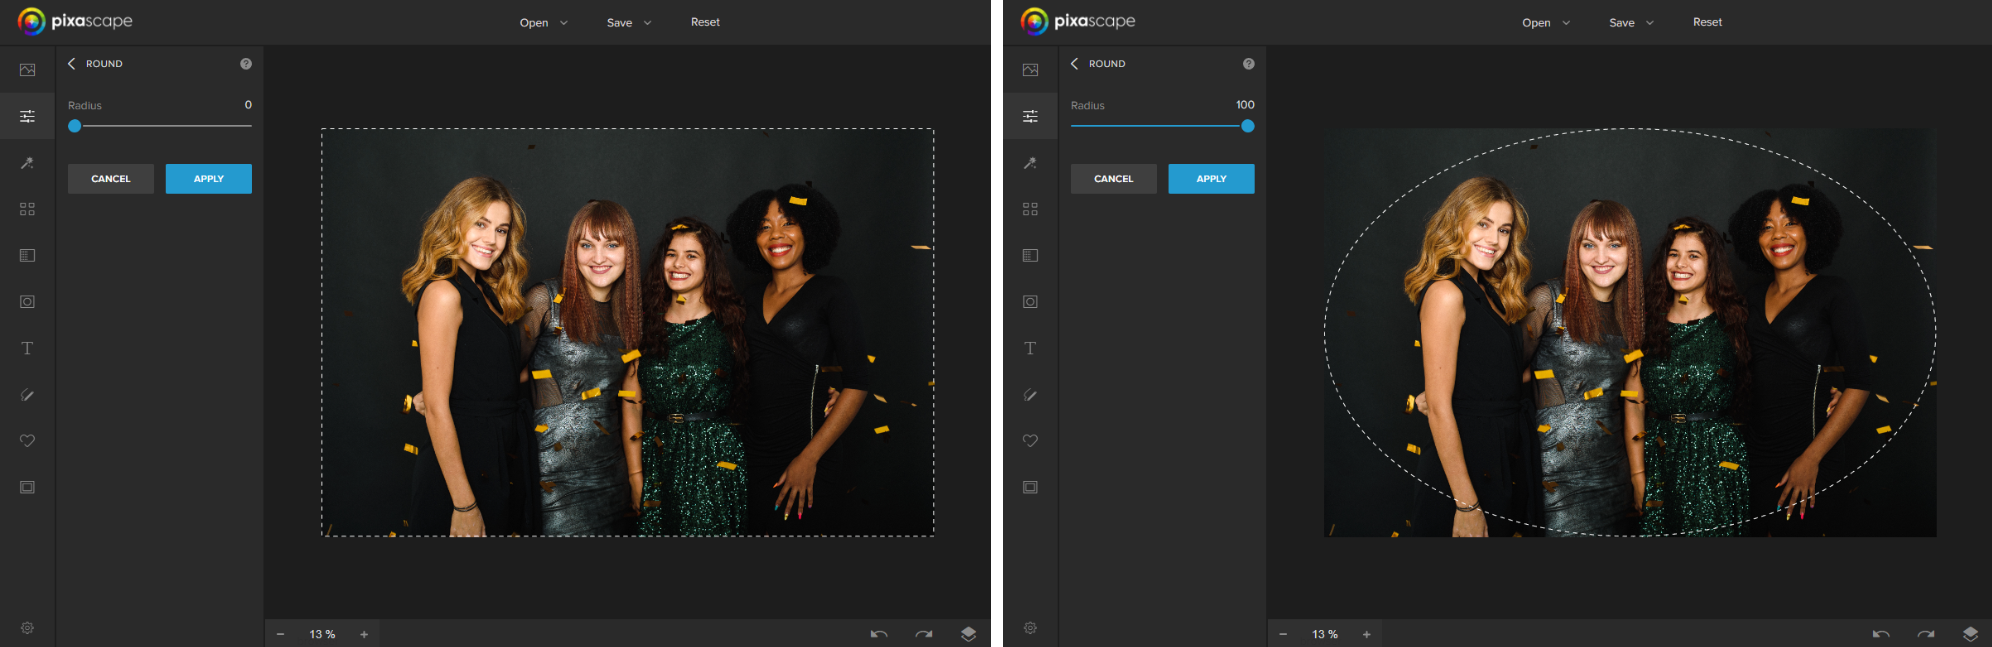
The dashed line shows you where the new border of your photo will be once you click the Apply button.
Use the blue sliding bar to adjust the radius of all the corners. The radius affects how round the corners are.

As shown below, setting the radius to 0 does nothing to your photo. Setting the radius to 100 will round the corners as much as possible.
Step 3 - Apply the Round Corners to Your Photo
Once you are happy with the radius setting, click on the blue Apply button to crop your image.

See what our rounded photo looks like below after clicking Apply.
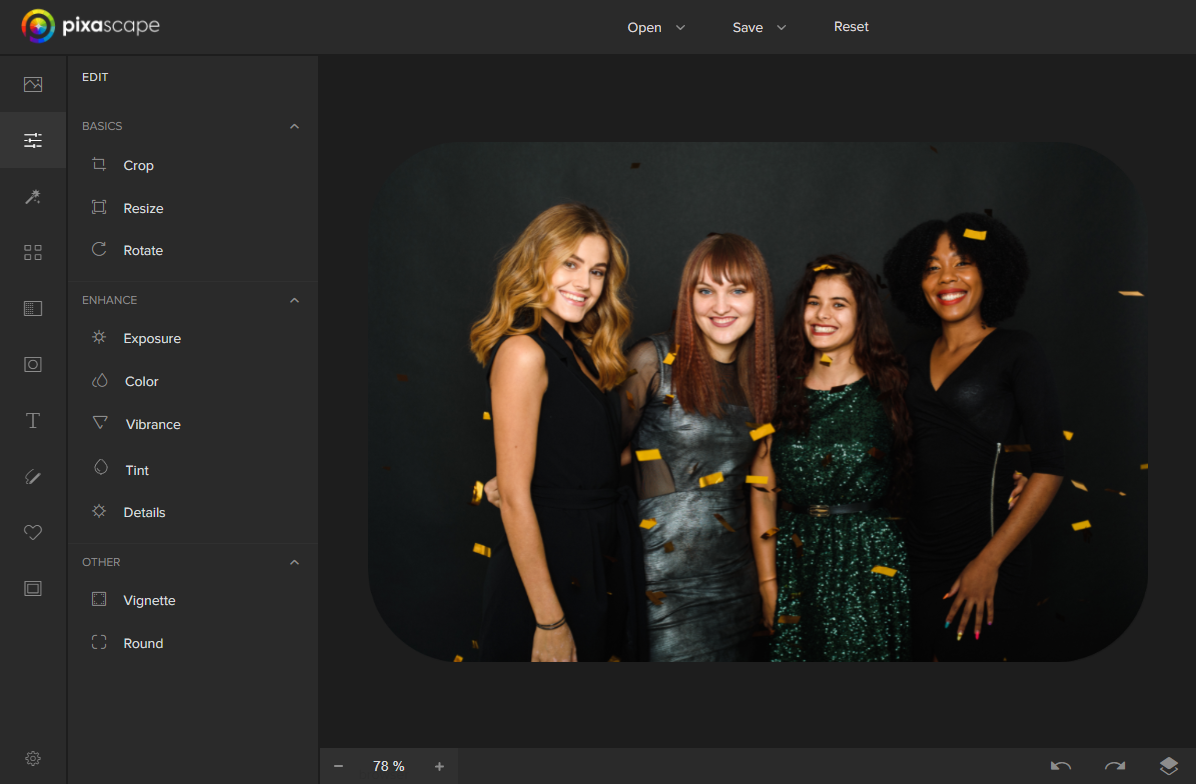
From here, you can edit your photo some more or save it. That's it! Didn't I tell you it would only take a few clicks to round your photos in Pixascape?!
If you are new to Pixascape and would like to learn more about using this software, take a look at our list of Pixascape tutorials.


