


By Design Bundles
Cricut Tutorials2 min
How to install the foil quill in the Cricut machine
*Cricut expression air 2 machine used.
1- Open the lid of your machine. There are 2 holders A and B. Undo the clamp on side A.
2- Using a little pressure from beneath and at the same time pulling from the top, remove the pen holder from the machine.
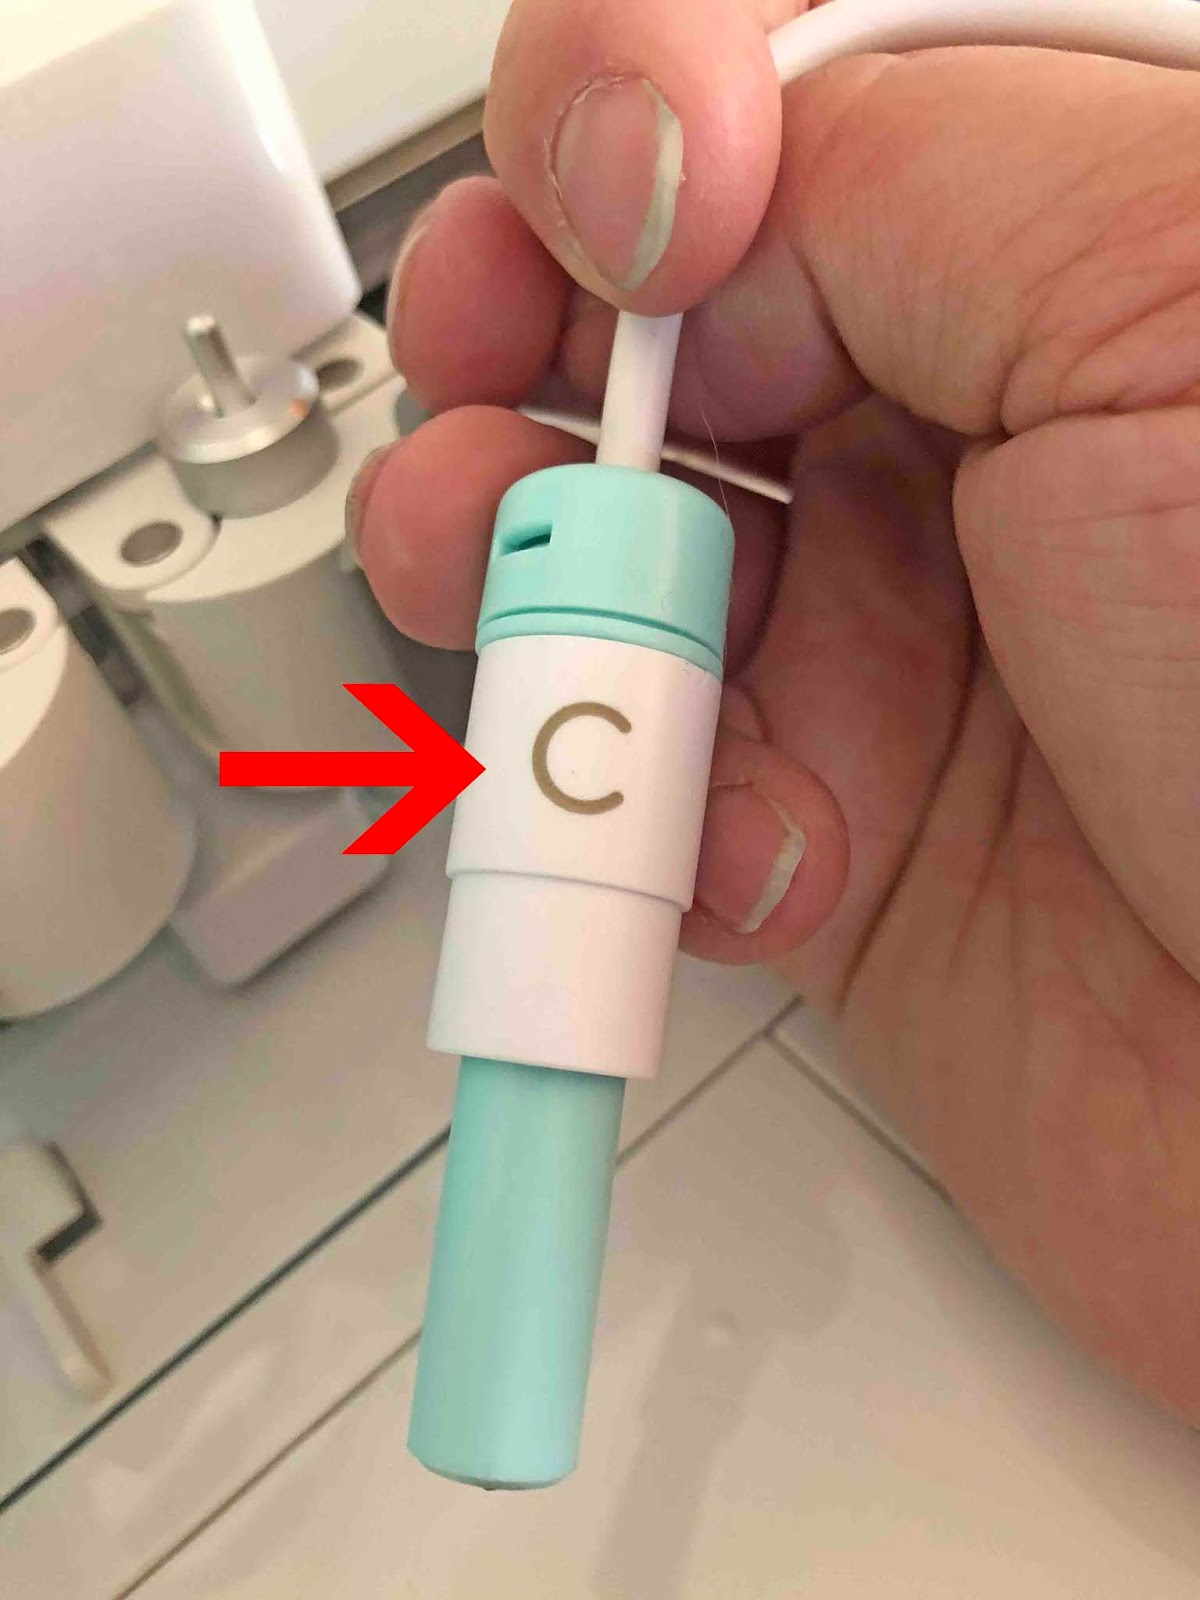
3- Screw in the C adapter onto the foil quill.
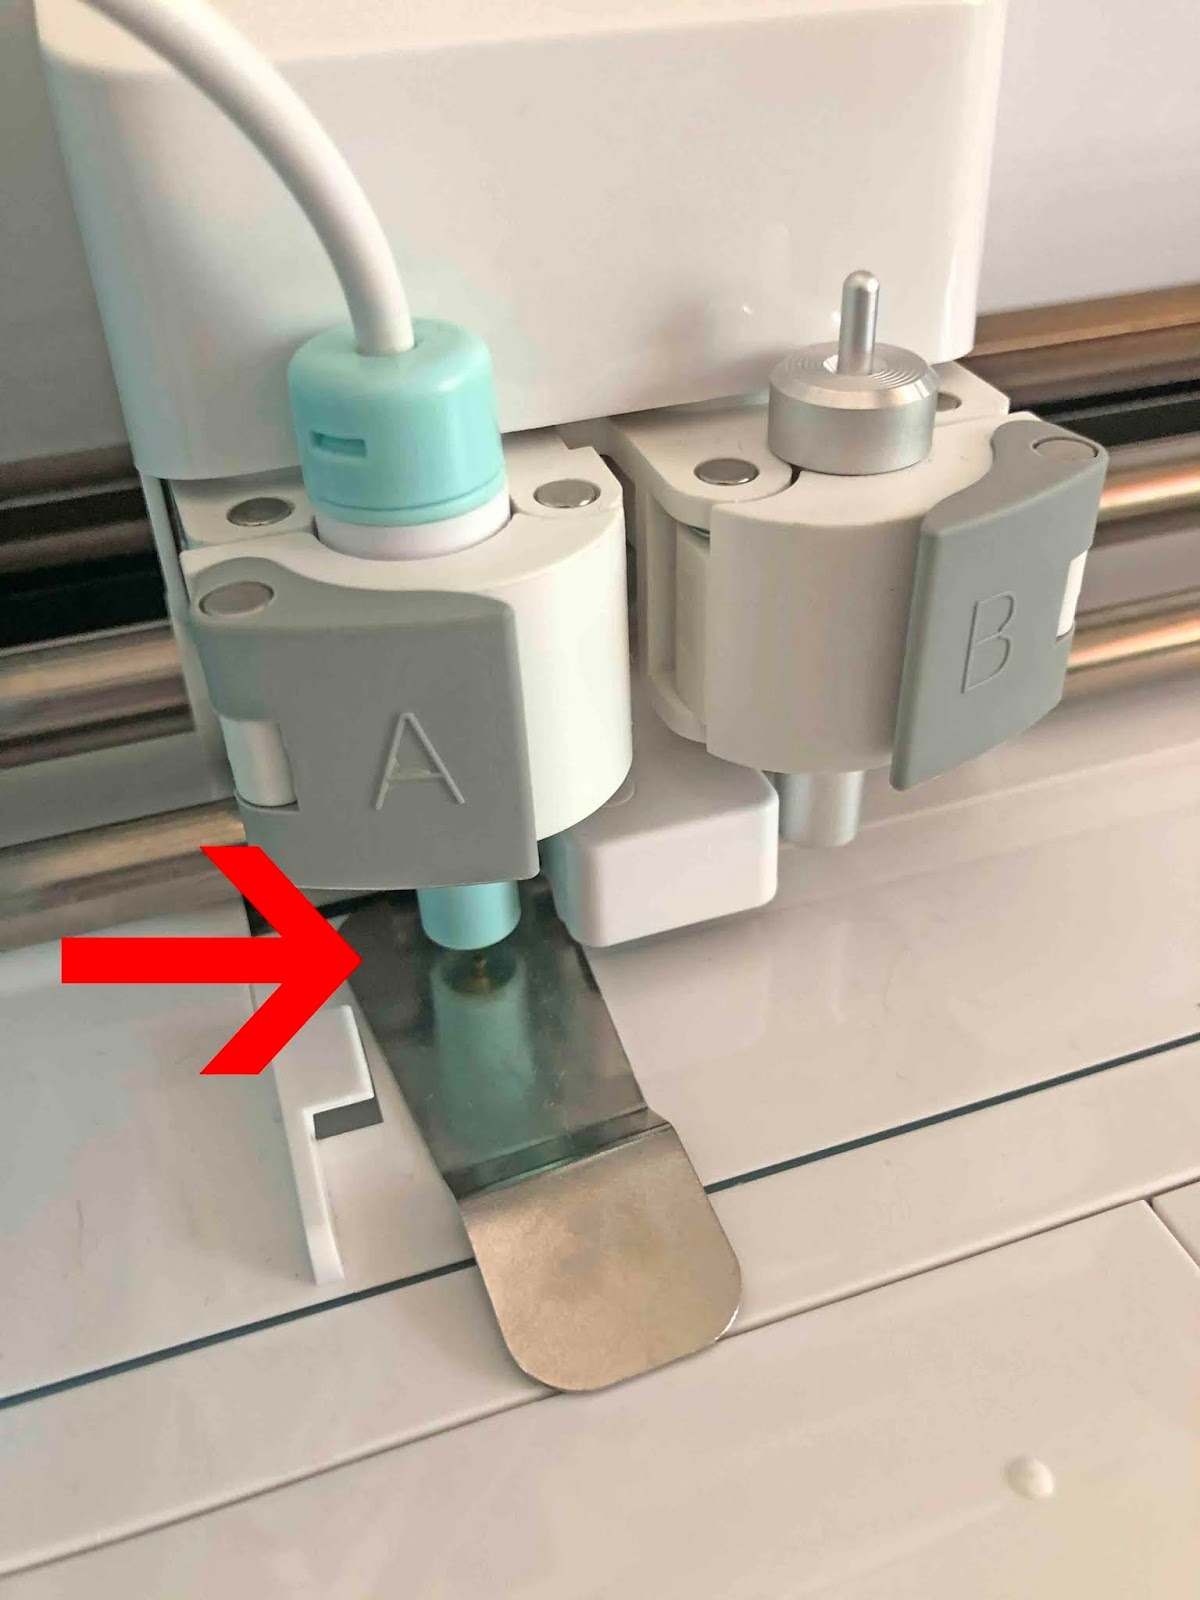
4- Place the foil quill into section A. Clamp the foil quill into it tight.
5- Place the metal protector under the quill tip. This is to protect your machine from the heat while the quill is heating up.
6- Plug your quill into a power source. You will see that the light will turn on once plugged into the power source. Leave to heat up for 5 minutes before you use the quill.
1- Open the lid of your machine. There are 2 holders A and B. Undo the clamp on side A.
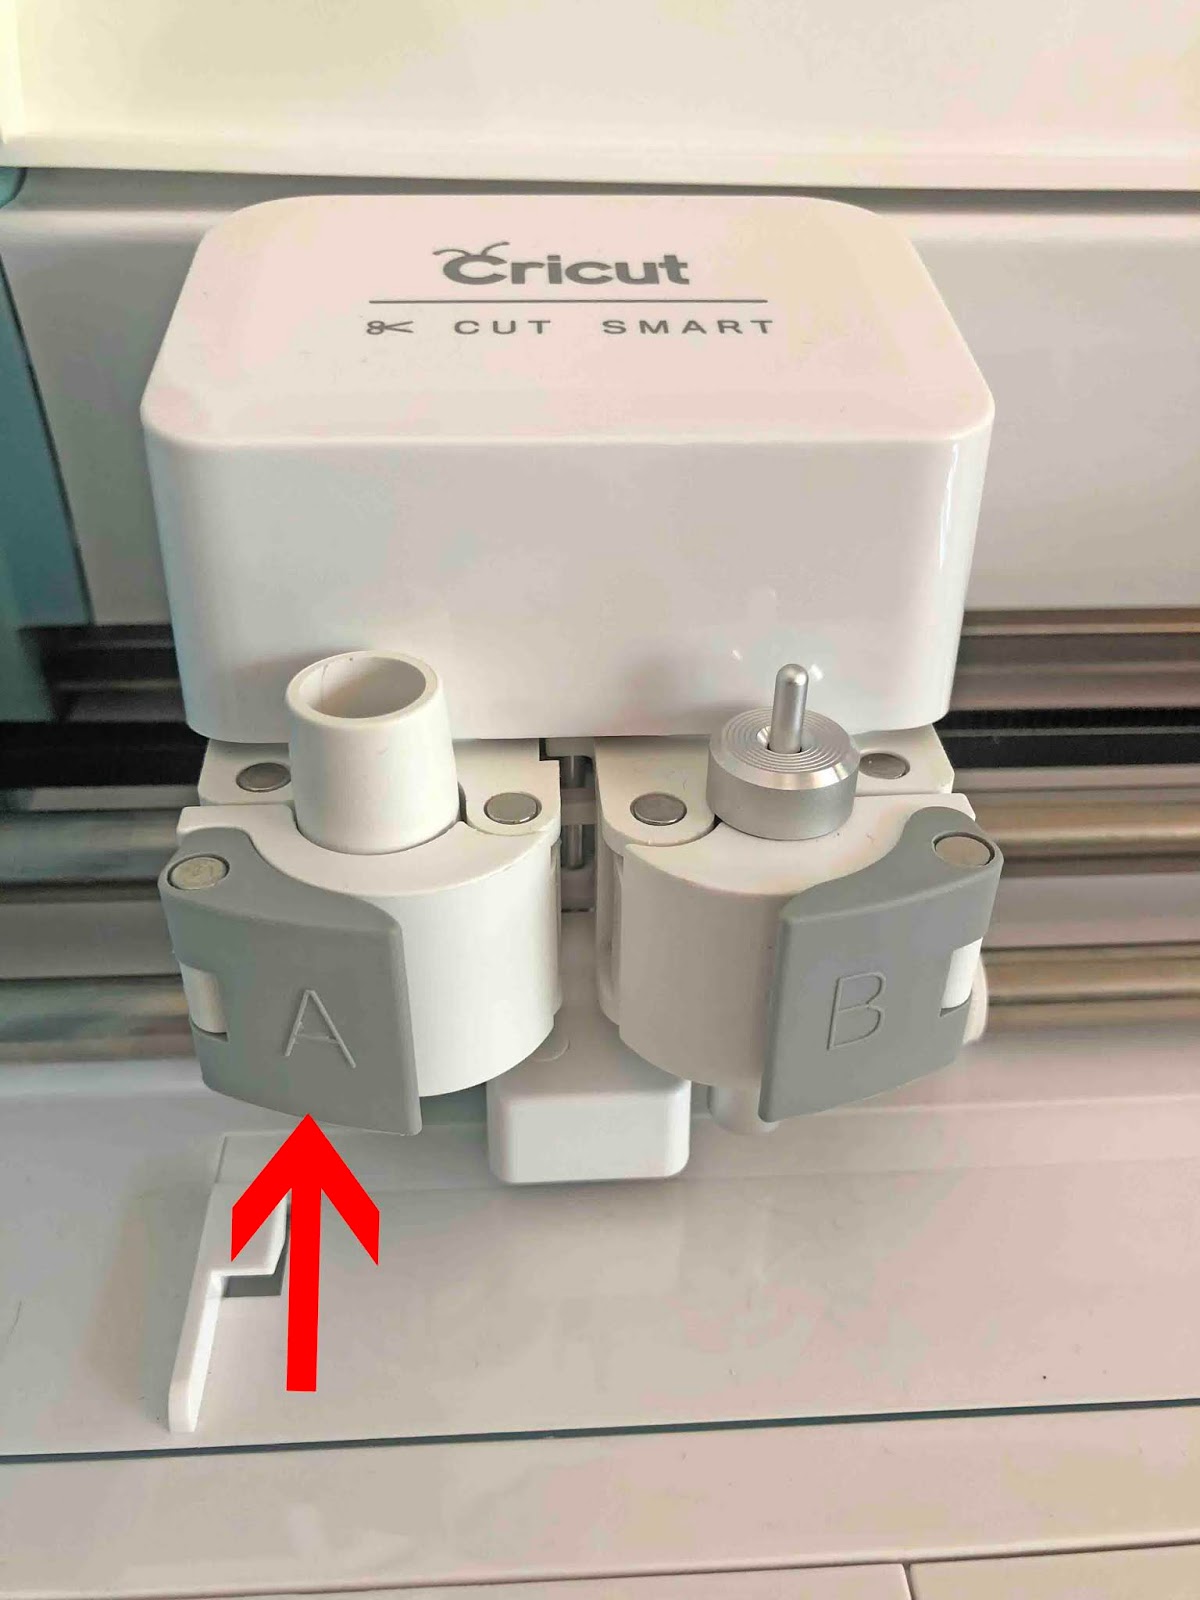
2- Using a little pressure from beneath and at the same time pulling from the top, remove the pen holder from the machine.
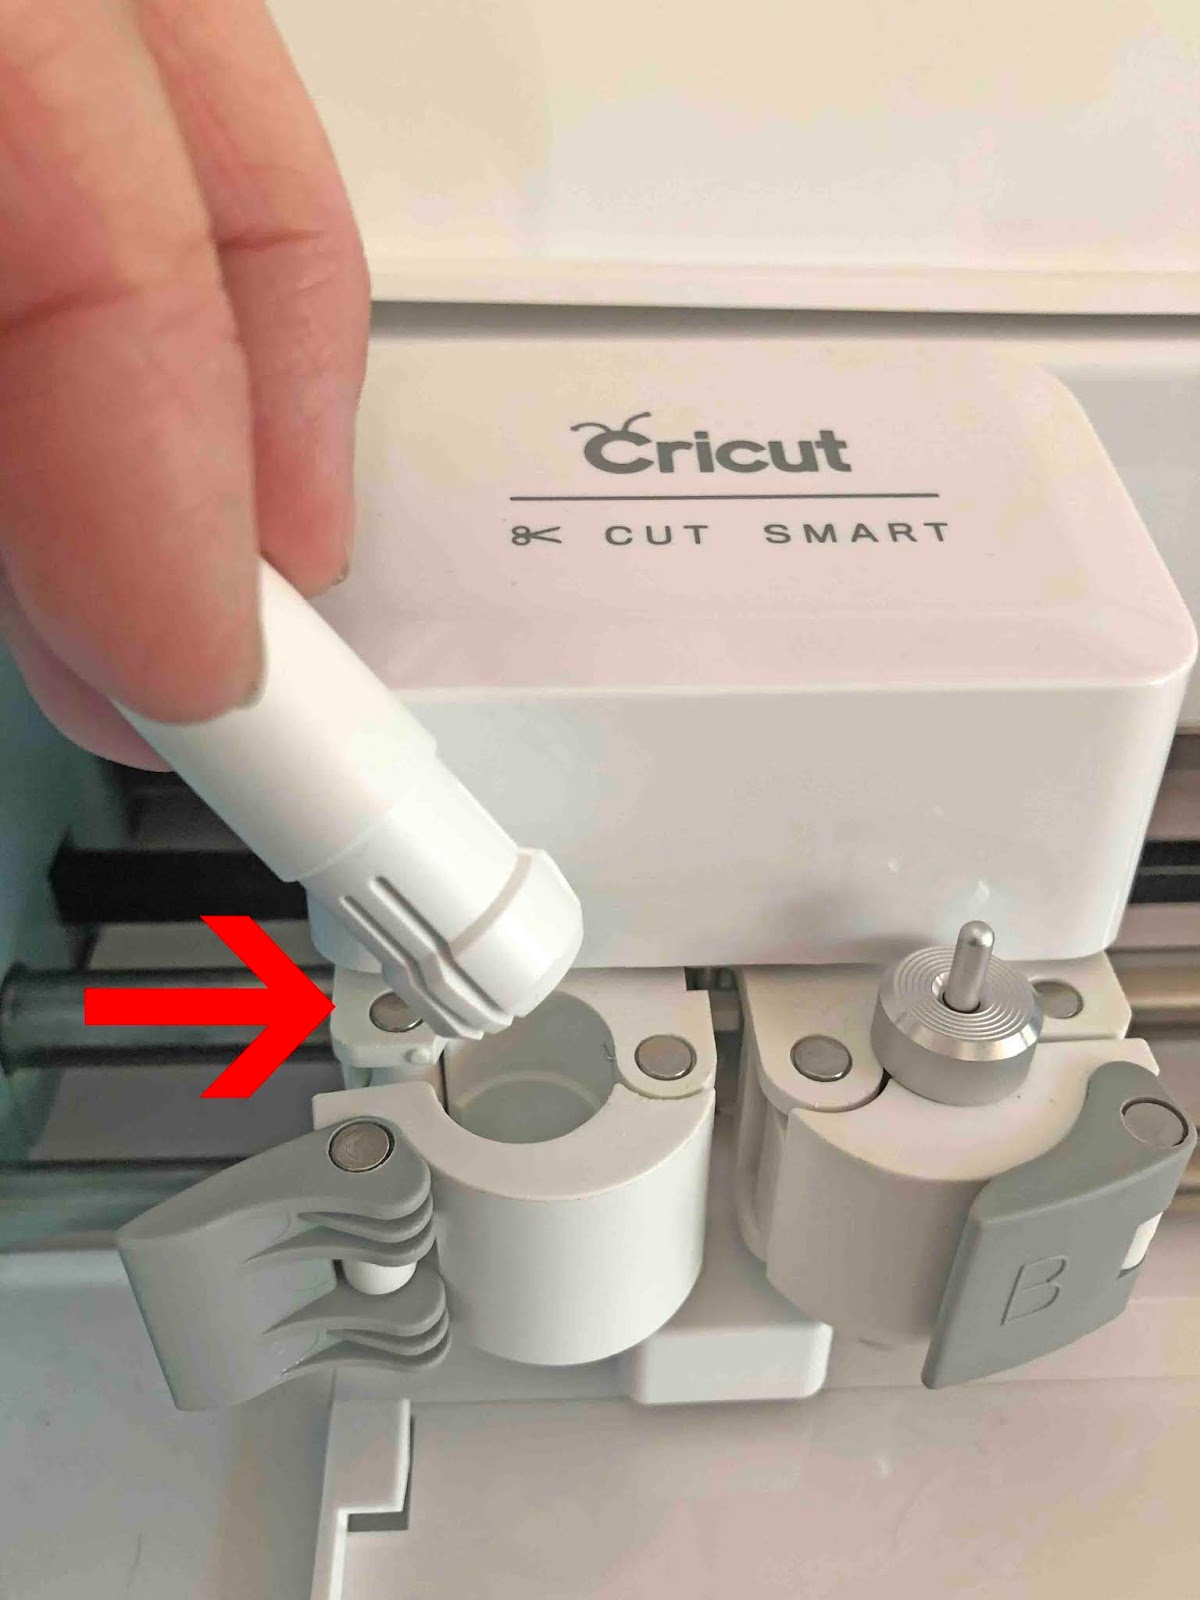
3- Screw in the C adapter onto the foil quill.
4- Place the foil quill into section A. Clamp the foil quill into it tight.

5- Place the metal protector under the quill tip. This is to protect your machine from the heat while the quill is heating up.
6- Plug your quill into a power source. You will see that the light will turn on once plugged into the power source. Leave to heat up for 5 minutes before you use the quill.

Related Tutorials
Scan N Cut Tutorials
Installing the Foil quill for the first time In Brother scan and cut machine
Cricut Tutorials
How to draw your first line in cricut design space using the foil quill
Learn to draw your first line in Cricut Design Space with this beginner step by step tutorial.
Cricut Tutorials
Creating decorative borders in Cricut Design Space using the foil quill
Learn how to to make unique borders for cards or other craft projects!
Cricut Tutorials
Foiling acetate using the foil quill in cricut design space
Cricut Tutorials
How to use fonts in cricut design space with the foil quill
Cricut Tutorials


